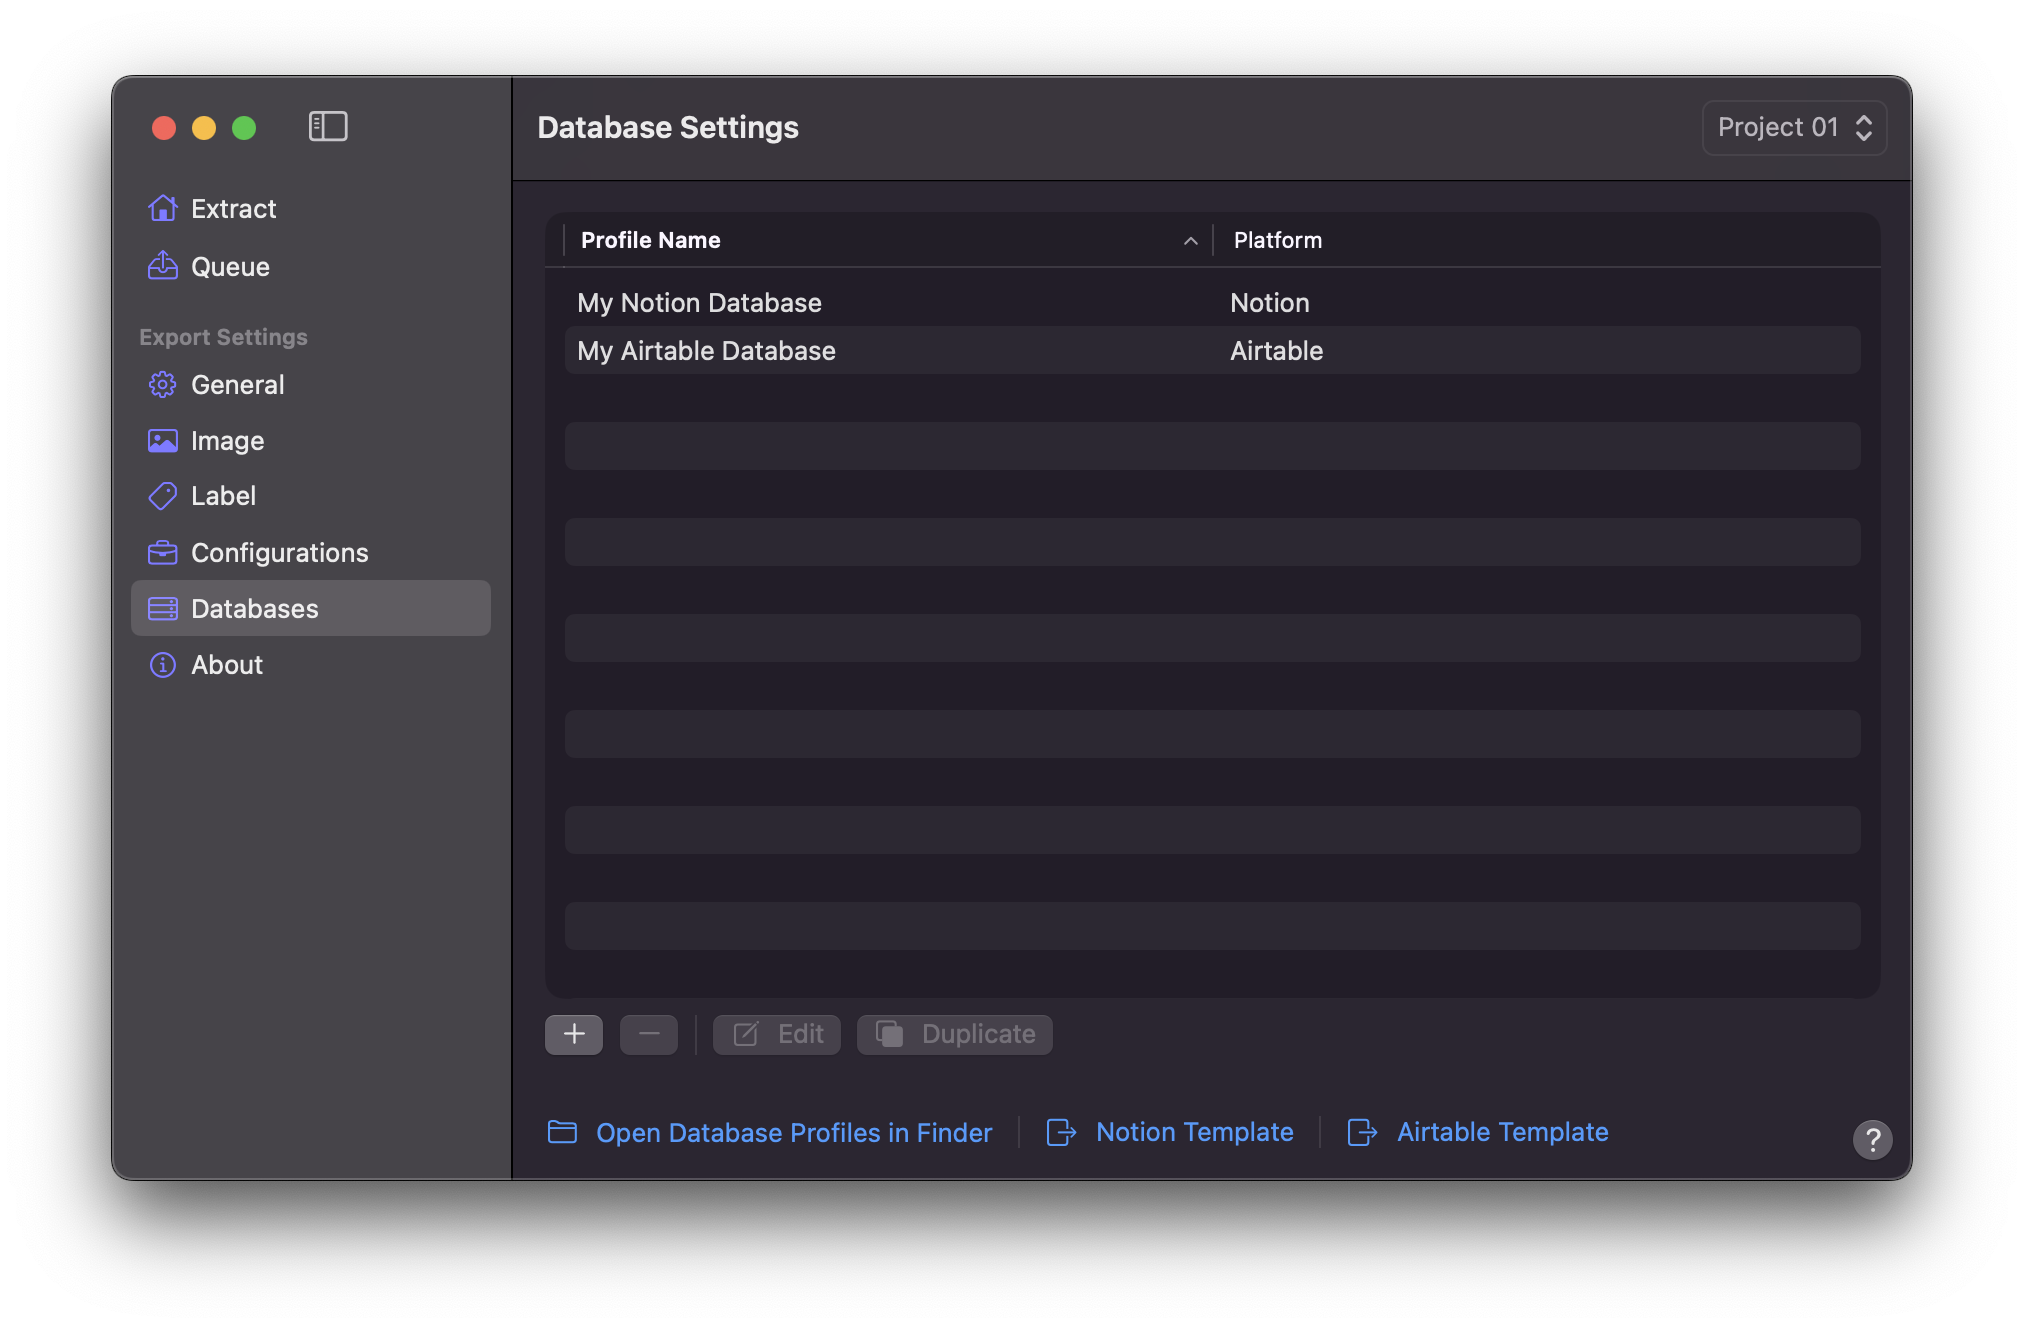
Database Settings
Info
Delve deeper into the distinctions and parallels between Notion and Airtable here.
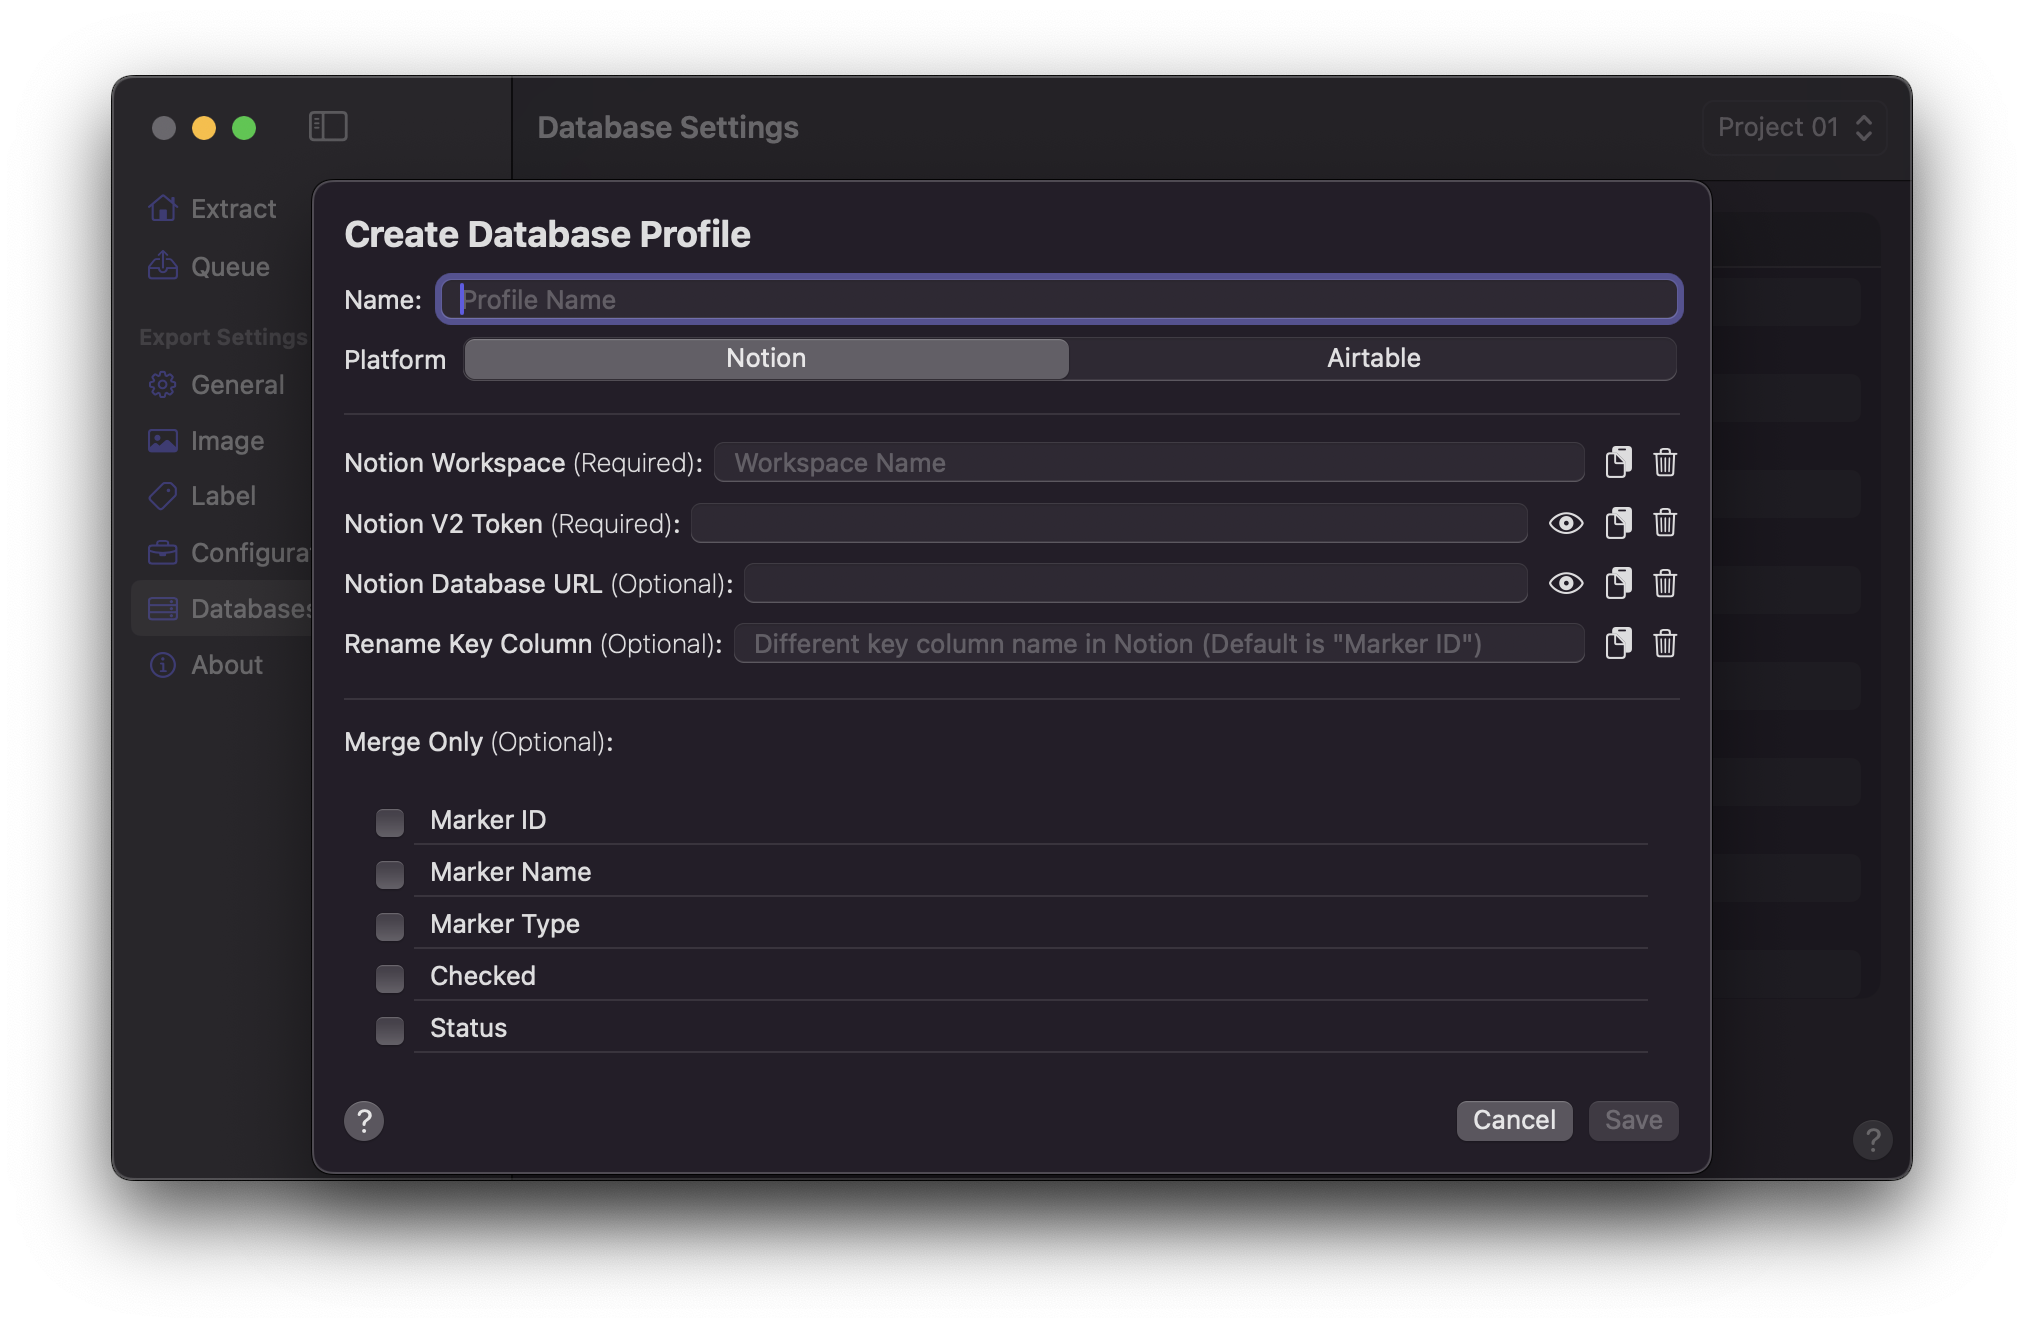
Creating Notion Database Profile
Info
For Notion Profile, it is imperative to underscore that users are mandated to utilise the provided Notion's Marker Data Template.
- Click on the
+button to Create Database Profile. - Enter a Profile Name.
- For Notion Platform, click on the
Notiontab. - Click
Saveonce values are entered.
Enter your Notion Workspace Name here.
Enter your Notion Integration Token here.
Enter your Notion Database URL here.
Info
Users must duplicate the supplied Marker Data Template. Subsequently, you can acquire the link from your duplicated Notion Template within your Workspace.
By
Default
Marker Data will designate the Notion's Key Column with the nomenclature of Marker ID. However, you retain the flexibility to establish an alternative form of Notion Database by integrating Marker Metadata from Final Cut Pro. To illustrate, you have the capability to designate your Notion's Key Column as, for instance, Shot Code. Upon configuring this setting in Notion, you may then input the same corresponding value in this field as Shot Code.
Warning
Please do not enter Marker ID into this field. Marker ID is the default key column and cannot be used in this field.
Merge Only offers users selectively merge or update individual columns within a Notion Database. By Default , the column selection feature of Merge Only remains inactive. The utilisation of Merge Only is only possible when Notion Database URL is provided.
Info
The utilisation of the 'Merge Only' column feature is presently confined exclusive to the Notion Database Profile.
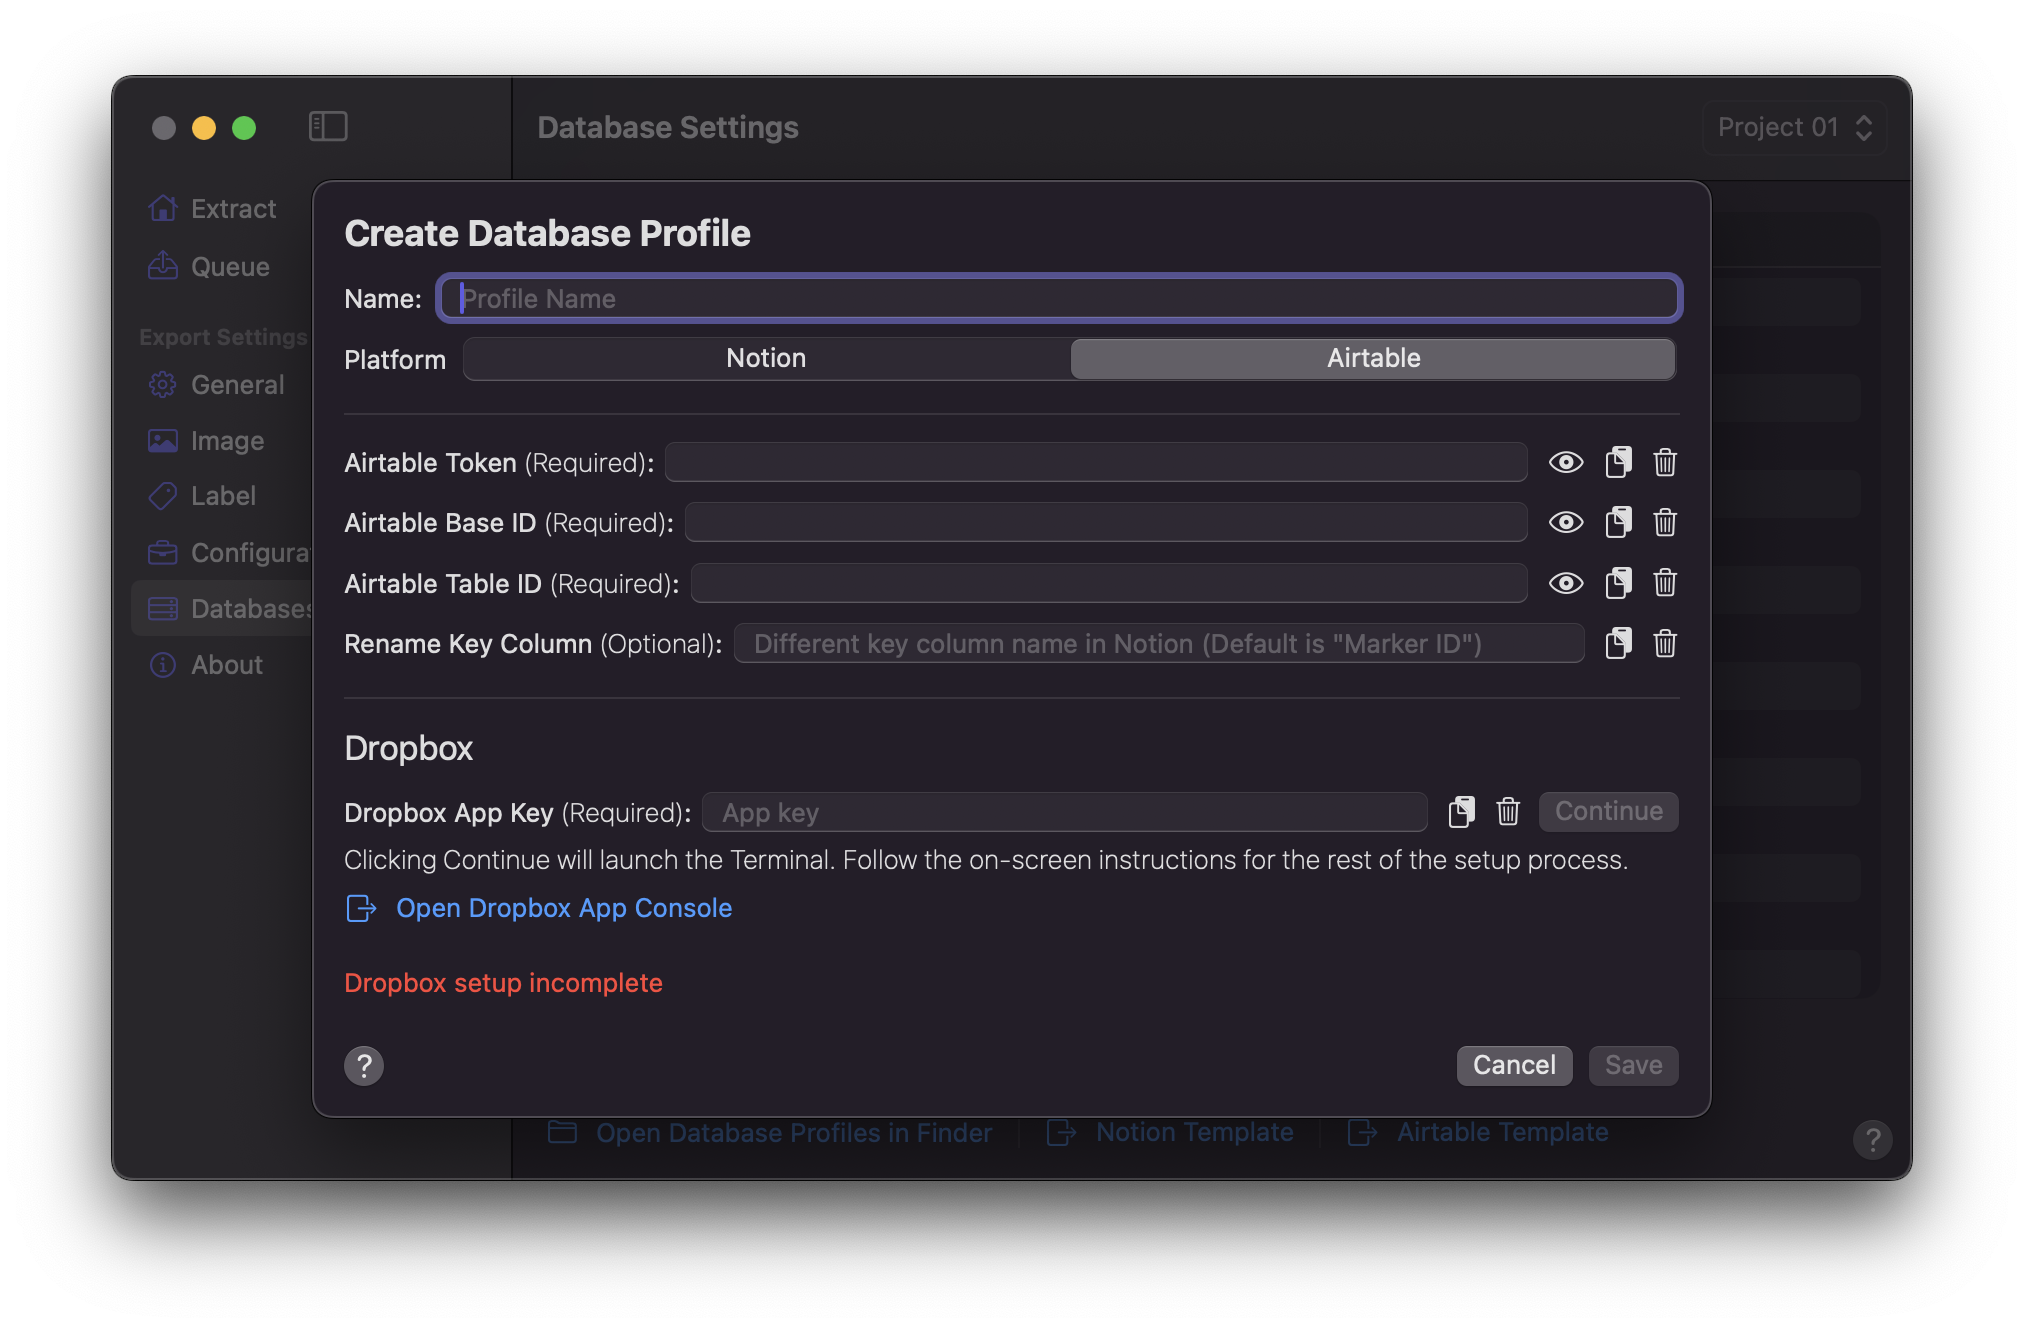
Creating Airtable Database Profile
Info
For Airtable Profile, it is imperative to underscore that users are mandated to utilise the provided Airtable's Marker Data Template.
- Click on the
+button to Create Database Profile. - Enter a Profile Name.
- For Airtable Platform, click on the
Airtabletab. - Click
Saveonce values are entered.
Enter your Airtable Token here.
Enter your Airtable Base ID here.
Info
It is strongly advised that you to duplicate the supplied Marker Data Template. Subsequently, you can acquire the Base ID from your duplicated Airtable Template within your Workspace.
Enter your Airtable Table ID here.
Info
It is strongly advised that you to duplicate the supplied Marker Data Template. Subsequently, you can acquire the Table ID from your duplicated Airtable Template within your Workspace.
By
Default
Marker Data will designate the Airtable's Key Column with the nomenclature of Marker ID. However, you retain the flexibility to establish an alternative form of Airtable Database by integrating Marker Metadata from Final Cut Pro. To illustrate, you have the capability to designate your Airtable's Key Column as, for instance, Shot Code. Upon configuring this setting in Notion, you may then input the same corresponding value in this field as Shot Code.
Warning
Please do not enter Marker ID into this field. Marker ID is the default key column and cannot be used in this field.
Enter your Dropbox App Key here. Setting up Dropbox integration is a one-time process. Whenever you duplicate or create a new Airtable Database Profile, the Marker Data feature will automatically utilise the pre-existing Dropbox App Key. If there arises a necessity to modify or refresh your Dropbox App Key, simply input the new value into the Dropbox App Key field and proceed accordingly.
Info
It is advisable to ensure prior login to your Dropbox Account has been completed.
- Ensure that all prescribed steps delineated here have been completed.
- Copy your App Key.
- Paste it in the
Dropbox App Keyfield. - Press
Continue. - Marker Data will launch Terminal.
- There would be small delay before the URL appears. Highlight the full URL, right-click to
Open Link. - Your default browser will be launched with the URL.
- Click
Continueand clickAllow. - Copy your unique
Authorisation code. - Return back to the Terminal session, and paste the
Authorisation code. - Press
Enteron your keyboard. - Once
Doneappears on the Terminal session, you can close your Terminal window. - You will see
Dropbox configuredtext on your Airtable Database Profile window.
Info
Upon initial utilisation, Marker Data will create a directory titled Marker Data within the root of your Dropbox and proceed to upload accordingly.
Duplicate Database Profile
You have the ability to duplicate any Database Profile by clicking on the Duplicate button.
Info
Through the utilisation of the Duplicate button, you can effortlessly generate numerous Database Profiles. The sole prerequisite is the substitution of the Database URL for Notion or the Base ID and Table ID for Airtable, thereby facilitating the quick replication of Database Profiles.
Edit Database Profile
You have the ability to edit any Database Profile by clicking on the Edit button.
Info
Upon the expiration of values, such as the Token, upon obtaining a renewed set of Tokens, you can update your pre-existing Database Profiles. This task is accomplished by clicking the Edit button, followed by Save button.
Delete Database Profile
- Click on the
-button. - You will be prompted for confirmation before deletion.
Open Database Folder in Finder
Select the Open Database Folder in Finder link to unveil the Finder directory housing the Database Profile files. You can copy the .json files to another location for the purpose of creating backups and restoration of your Database Profile files.
Notion Template

Airtable Template