#
Sending to Logic Pro

#
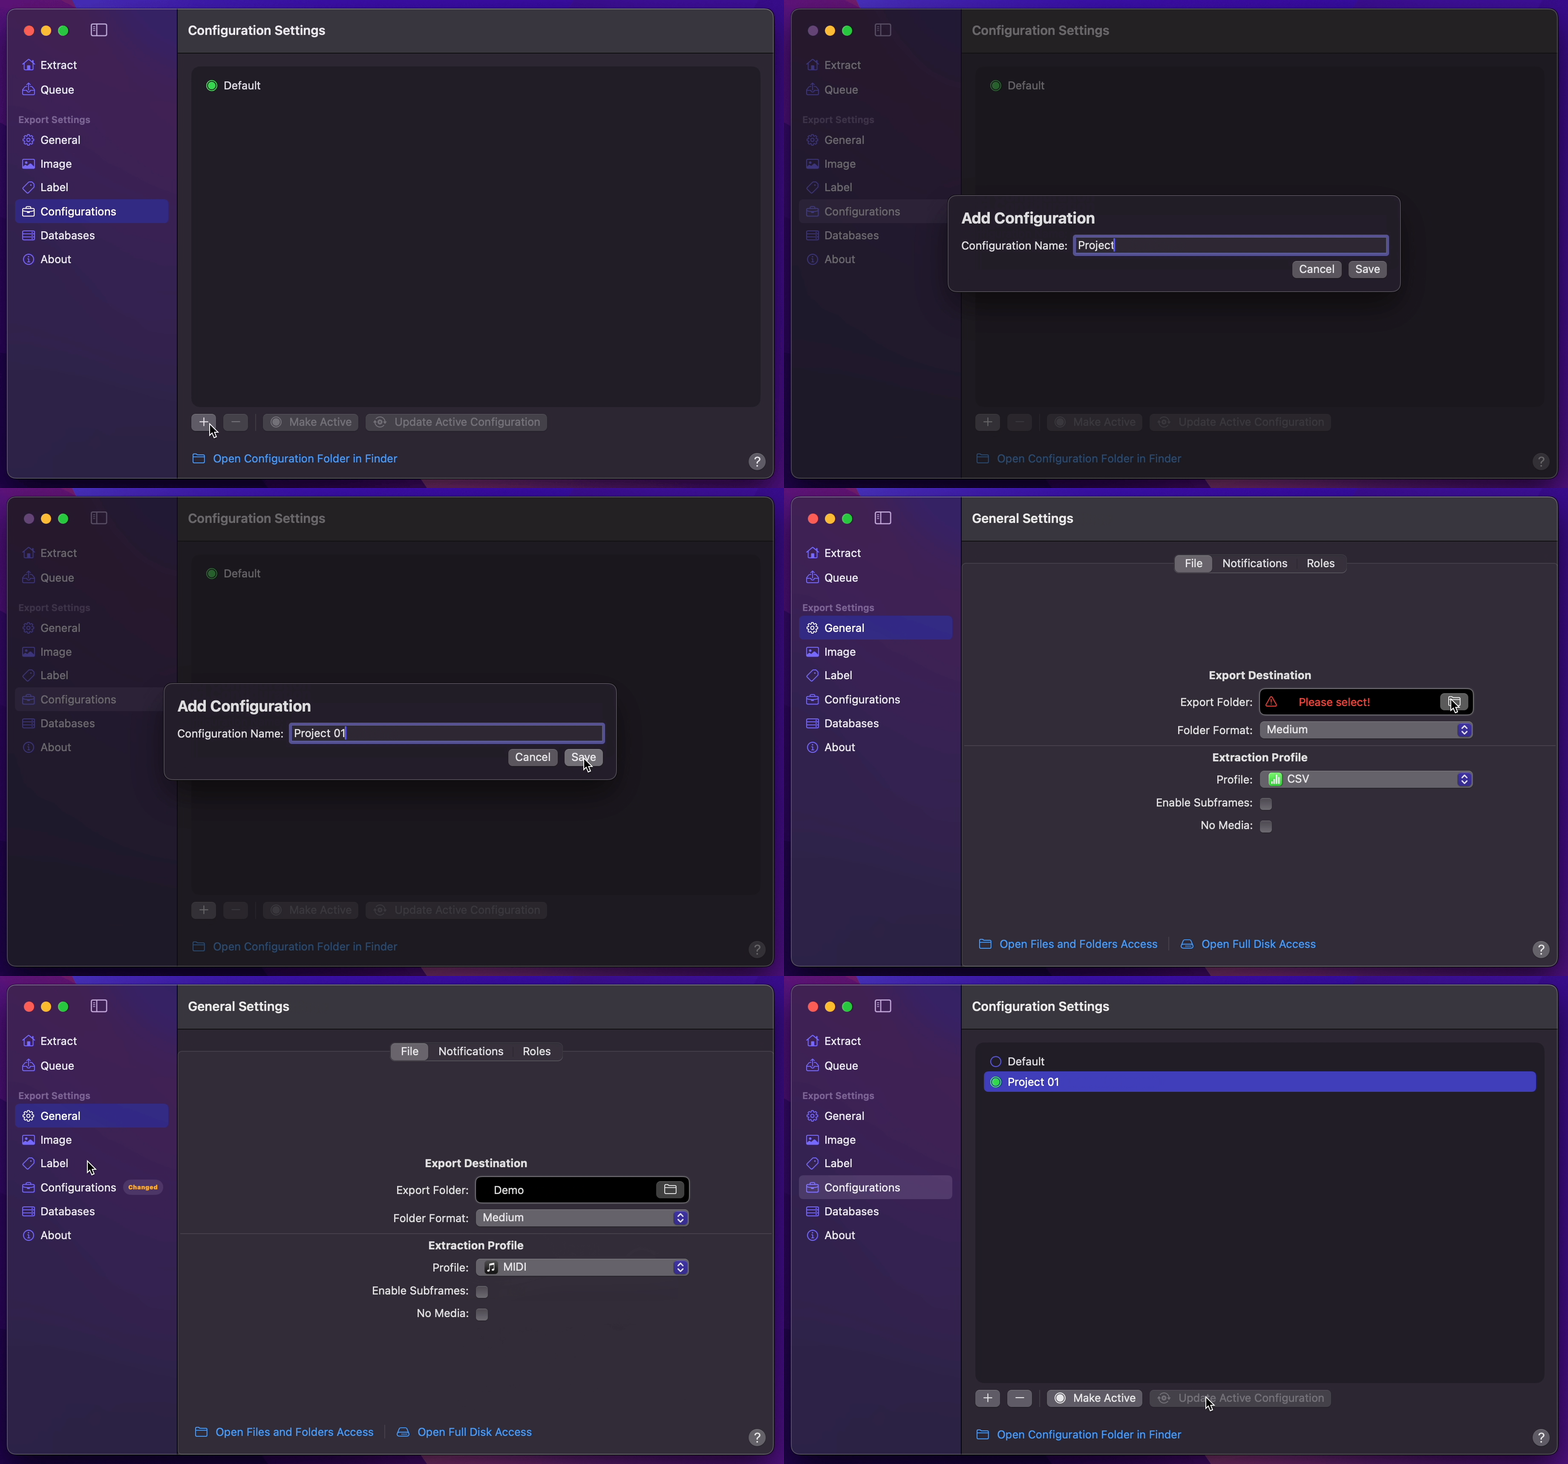
Configuration Setup

- Create Your Configuration.
- You can select your desired Export Destination by clicking on the Folder Icon.
- You can select MIDI as your Extraction Profile.
- Return back to Configurations to Update Active Configuration
#
Final Cut Pro to Logic Pro
Info
This demonstration presupposes the presence of an already opened Logic Pro Project session, within which you intend to incorporate the extracted Markers from Final Cut Pro.
- After Marker Data completes its extraction task, drag
.midfile onto Logic Pro's App icon, or right-click on the.midfile toOpen WithLogic Pro.app.
Info
You may want to drag the Project's end handle to the right to be able to see all the Markers, as it will interpret the project to only be a bar long on first open. (But it's not necessary if we just want to copy and transfer the Markers.)
- Open the Logic Pro's Marker List window.
- Select
Show Event Position and Length as TimeunderViewmenu.
Info
This will display timecode instead of bars & beats to preview their time position.
- Select all the Markers by pressing
⌘Aon your keyboard. - With all the Markers are selected, select
CopyunderEditmenu.
Info
Take note of the timecode of the earliest marker for reference later.
- Switch to the existing Project session you want to transfer the Markers into.
Info
Go to Logic Pro's Synchronization options under File, Project Settings. Ensure that Bar Position <first bar> is set to a timecode that is equal to or earlier than the first marker's timecode. Also ensure that Frame Rate matches with Final Cut Pro's timeline Frame Rate.
- Open Marker List window of your existing project, select
PasteunderEditmenu.
