#
Airtable Prerequisite
#
Obtain your Personal Access Token
- Login to your Airtable account via a web browser.
- Go to Personal access token, click the Create new token button to create a new personal access token.
- Give your token a unique name. This name will be visible in record revision history.
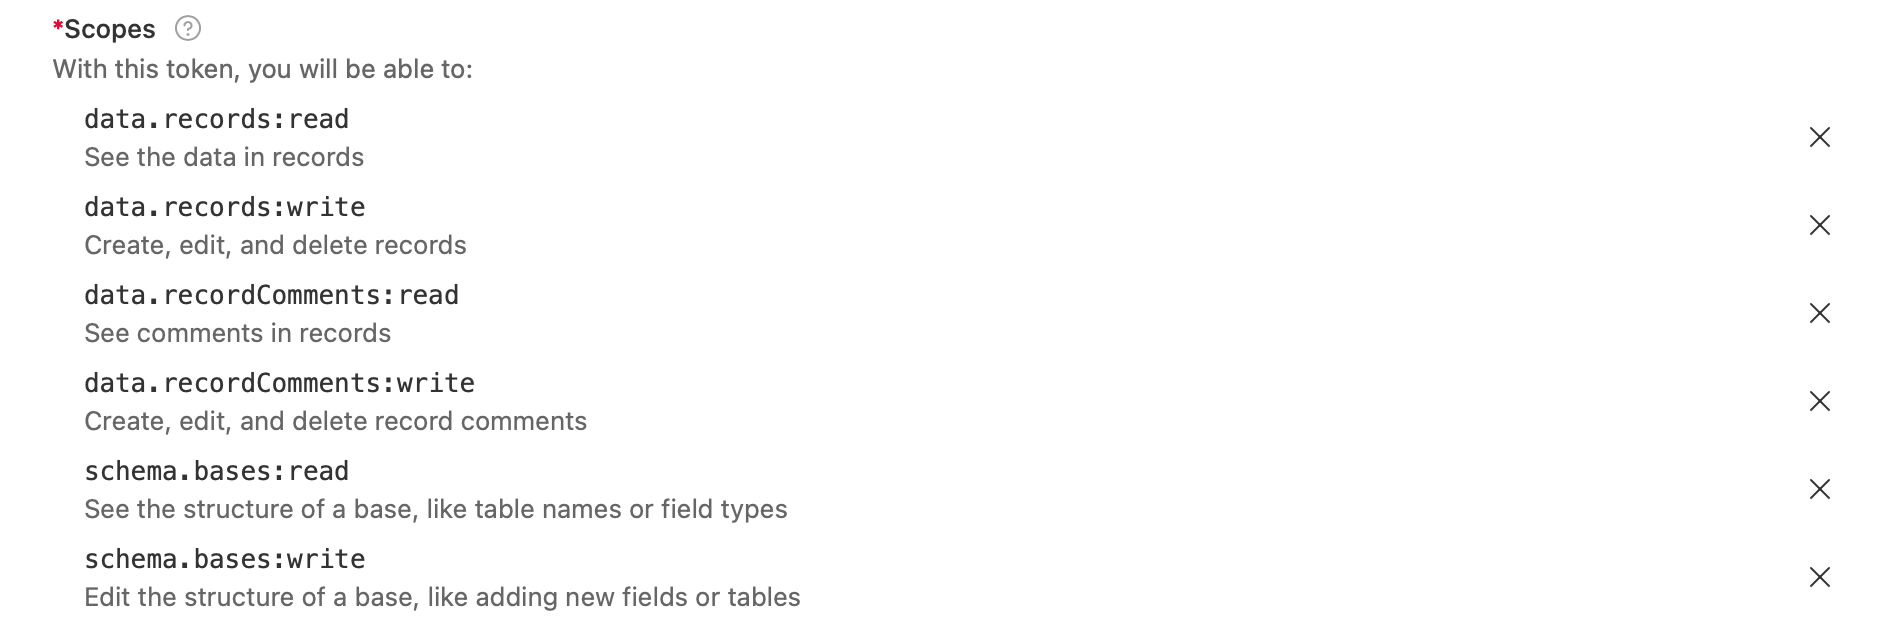
- Add the following scopes to grant to your token. This controls what API endpoints the token will be able to use.

- Click add a base to grant the token access to a base or workspace.
Info
You can grant access to any combination and number of bases and workspaces. You can also grant access to all workspaces and bases under your account. Keep in mind that the token will only be able to read and write data within the bases and workspaces that have been assigned to it.
- Once your token is created, the token will only be shown to you once, it is encouraged that you to copy it to your clipboard and store it somewhere safe. While you will be able to manage it in Personal access token, the sensitive token itself is not stored for security purposes.
#
Obtain your Base ID & Table ID
- When you have a base open in a compatible web browser, you should see a URL in the address bar that looks similar to the example below.

In between each backslash, you will find a string that identifies the base, table, and view IDs.
- Base IDs begin with "app"
- Table IDs begin with "tbl"
- View IDs begin with "viw"

Info
We only require Base ID and Table ID for Marker Data.
To know more about attachments and obtaining your Dropbox's App key, please read Dropbox Prerequisite.
